Showing posts with label recipe. Show all posts

Monday, October 26, 2015

I want to make all things pumpkin

I don't know who all these people are that keep saying they are "so over" the pumpkin craze. Because I am not. I am so not over pumpkin. Pumpkin is a fall vegetable that I love eating at this time of year. And this is a super easy dip that has been causing everyone in my family to look forward to an afternoon snack of apple slices.   

5-Ingredient Creamy Pumpkin Dip
Makes 1 cup
Time: 5 minutes to make plus 30 minutes to chill.

1/2 cup pumpkin puree (NOT pumpkin pie filling)
1/2 cup daiya cream cheese
1 1/2 tablespoons maple syrup (or you can add more if you'd like it sweeter)
1/2 tsp vanilla extract
1 tsp ground cinnamon


Wisk together ingredients.  Once you have it mixed everything, put it back in the fridge for at least half an hour to chill.  If you're in a huge rush you can skip this step but it really is at its best when served ice cold. Sometimes if it's been sitting out for a bit I will pop it back into the the fridge or freezer for a few minutes to chill it down again.  Otherwise if it gets too warm you get that little hint of the fake cream cheese taste.  

Serve with apple slices or graham crackers for dipping.


Monday, April 6, 2015

The best Russian Dressing

I discovered how to make the best Russian dressing completely by accident one day when I was trying to save time and decided to use my microplane grater on the onion instead of chopping it finely, which is what I normally do.  And the way that the microplane-grated onion infuses the entire dressing is just really magical if you have a fresh, sweet onion.  The recipe calls for a tablespoon of the grated onion but it takes a pretty good amount of onion to get that much so make sure you have at least quarter or half of an onion to work with.  


Russian Dressing
adapted from How to Cook Everything by Mark Bittman

1 cup mayonnaise 
1/2 cup ketchup 
2 Tbs red or white wine vinegar
1/4 tsp dry mustard (or a little prepared mustard if you don't have dry)  
salt and freshly ground pepper to taste  
1 tablespoon onion (that has been grated using a microplane)


Wisk together all ingredients except the grated onion. Add 1/2 tablespoon of the onion and taste.  If you have a strong tasting onion, that may be all you want to add.  But if you have a nice fresh, sweet onion, you can add the full tablespoon. Wisk until smooth.  If it's too thick, you can thin it with some ketchup or vinegar.  

To make this into thousand island dressing, add pickle relish to taste. 

Mark Bittman recommends using this as a sandwich topping (mmmm... Reubens!) but I really like it as a dip for cut up raw vegetables.  I also eat it all the time on green salads, especially when we have Romaine Lettuce and I'd prefer a creamy dressing.

This lasts for a couple of weeks in the fridge if you don't eat it all first!


Sunday, November 9, 2014

3-ingredient Pumpkin Pie Soup


Long before I ever had kids, before I ever thought about food allergies, I was an intern in DC and there was this little cafe there that was not too far from where I was living so I went there a lot.  I was short on time and money and it was on the way to the Metro stop and very inexpensive. In the fall, one of their specials was pumpkin soup and I could get that and a grilled cheese sandwich for less than $5.  I'm assuming if you are reading this blog, you probably are not going to serve this soup with a grilled cheese sandwich, but my memories of this place are all wrapped up in that soup and the grilled cheese sandwich so just bear with me. I cannot tell you how many times I ordered that soup and sandwich combo.  I just could not get enough of it. I loved going to that place and it wasn't even nice inside.  I just felt so cozy dipping my grilled cheese into my soup. 

After I moved, it drove me crazy because I don't think I ever even knew the name of the place and, a few years later, when I tried looking around where I thought it might have been I couldn't find it.  So I could never get another bowl of this amazing soup or ask the people (it was always the same 2 people) who worked there how to make it!  I spent years, literally years, trying to duplicate the recipe from memory and was always very disappointed.  I would go through the trouble of roasting a pumpkin, chopping vegetables, cooking down the soup for a long time and then, after all of that, be supremely let down.  The first time I remember making the soup it was not just disappointing, it was terrible; I under cooked the onions so it was kind of crunchy.  Crunchy soup is never good.  

Imagine my delight when somewhere on the internet I found a recipe for pumpkin pie soup that tasted exactly the way I remembered THE pumpkin soup and it was pretty much the easiest thing in the whole world to make.  The original is made with heavy cream but I subbed coconutmilk with excellent results after I went dairy free.  


Pumpkin pie soup
Serves 6 as an appetizer

  • 1 can pumpkin pie filling (not plain pumpkin)
  • 2 cups chicken stock or broth
  • 1/2 cup canned coconutmilk (full fat, not reduced fat)


Stir ingredients into a pan and heat.  That's it!


I can't decide whether this soup is better hot off the stove or after it has cooled a bit.  I think objectively it might taste better room temperature but since the soup of my memories was always warm, I prefer it that way.  Try it both ways, see how you like it.
  
We ate this for dinner yesterday (although I actually don't recommend it as a main dish, because it's too sweet for that).  Since I usually try to avoid eating food from cans I normally only indulge in this soup once a year.  This year it was extra great because we paired it with New Glarus Pie Lust beer, which I had never had before.  The slight bitterness of the beer balanced well with the sweetness of the soup.  I know absolutely nothing about pairing alcohol with food and so this recommendation should be taken with a grain of salt. But I daresay the soup went better with the beer than a grilled cheese sandwich...

Monday, August 11, 2014

Paleo chocolate ice cream

If you've never made a paleo "ice cream" before you may be surprised at how quick and easy it is. This is such a tasty treat that has a consistency kind of like soft serve ice cream. Keep in mind you will need pre-frozen bananas for this recipe.  And get out the spoons and napkins before you start because it melts quickly even in an air conditioned house!  


Paleo chocolate ice cream
Serves 2

large bananas (broken into chunks and frozen)

1.5 Tbsp cocoa powder
2 Tbsp coconutmilk
1 tsp vanilla (I use alcohol-free vanilla but the kind with alcohol works too


Put the frozen banana pieces into the food processor and run it for a few seconds until it gets pretty broken up. 
It will look like this:

 
Then add the other ingredients and puree until smooth, scraping down the sides of the food processor at least once so the cocoa powder gets mixed in.  Depending on the size of your bananas you might alter the quantities of the other ingredients a bit. And if you like things super chocolate-y, add 1/2 tablespoon more of the cocoa powder, that's how I like it!  Just taste as you go, it's pretty hard to screw it up! This is best eaten immediately, I have frozen it before and the texture isn't as good later on.  Enjoy!  


Friday, March 7, 2014

I'm glad it's still cold out...

...because our family discovered something new this winter and I'm super excited to write about it.  Well, technically we discovered something that is very old but new to us:  savory porridge (known at our house as savory oatmeal).  We've always eaten a lot of oatmeal but my husband started to get sick of eating the same thing over and over so he started to look for savory oatmeal recipes.  And now we eat savory oatmeal all the time because it's so simple and delicious. My son still prefers his oatmeal made with almondmilk and cinnamon, but that's no problem because the basis of savory oatmeal is just plain oatmeal so it's easy to add whatever each individual person wants. I think this is best when made with steel cut oats but we've made it with just about every type of oatmeal available at the supermarket, and most often use quick oats, since we're usually short on time.  

If you're still not convinced about the greatness of savory porridge, check out the Golden Spurtle Competition or this on Mark Bittman's savory oatmeal with scallions and soy sauce.  


Savory Oatmeal - the basics
a bowl of oatmeal, made with water according to package directions.  
a sprinkling of sea salt or other coarse salt
a sprinkling of cracked black pepper (optional)  
a drizzle of extra virgin olive oil  

Add-ons (choose one)
diced avocado 
pine nuts or other savory nuts (such as roasted cashews or pistachios)  
eggs, cooked anyway you like them 
crumbled bacon
sliced breakfast sausage
leftover ham, steak, or chicken, or whatever meat you had for dinner the night before 
heated up pieces of lunchmeat 

My favorites are the diced avocado and the ham.  We don't normally eat ham for dinner so I've gone out and bought a hunk of ham to cut into small pieces and freeze for use in oatmeal.  Yum!  

Monday, January 20, 2014

Not too sweet granola

Let me tell you what I love about this granola.  I adapted this recipe from the blog Orangette, which is a blog that I have been reading for years but is a bit tough for someone avoiding dairy.  Lots of her recipes, especially the yummiest sounding ones, involve butter, cream and the like.  But in the post about her daily granola, she actually recommends having it with soymilk, over dairy yogurt or milk.  So there you go, a granola that tastes better dairy free!  

If I'm going to take the time to make something at home that I can easily purchase at the store (there are lots of delicious dairy free granolas!), it had better be healthy.  So I set out to make a less sweet version of her granola that I think is quite tasty!  If you are used to eating store bought granola (which is loaded with sugar), I would suggest increasing the brown sugar to 3/4 cup (which is how much Orangette recommends).  

Not Too Sweet Daily Granola
adapted from Orangette 

Dry ingredients:
5 cups rolled oats
2 cups pecan pieces (or halves if that's what you've got) 
1 cup raw sunflower seeds (hulled)
1/3 cup sesame seeds (or more if you like the flavor of sesame seeds)  
1/3 cup brown sugar
2 tsp. ground cinnamon
1 tsp. ground ginger
1 tsp. salt

Wet ingredients:
¾ cup unsweetened apple sauce
1/3 cup brown rice syrup
¼ cup honey
2 Tbsp. vegetable oil, such as canola or safflower


Preheat oven to 300 degrees.  Mix the dry ingredients in a large bowl. Mix the wet ingredients in a smaller bowl.  Add the wet to the dry and stir until evenly coated.  Spread the granola evenly onto two cookie sheets and bake for about 40-45 minutes total.  However, every 10 minutes or so, you will need to stir the granola and rotate the pans so you aren't cooking one of them on the lowest rack of the oven the whole time.  (Set a timer for the total cooking time as well as a 10-minute timer or, if you're anything like me, you'll forget entirely!)

I've found that figuring out when granola is done is a little trickier than most recipes let on.  I like mine to be crispy so I make sure to bake it until it has started to get golden brown but hasn't developed a dark brown color yet.  It will still be soft at this point, but will harden as it cools.  Make sure you stir it when you take it out of the oven and then a few more times while it's cooling so it doesn't get all stuck together.  

Store in an airtight container. When I make granola and store it in a mason jar, it makes me feel like Martha Stewart but, of course, a gladware container will do as well! If you want to keep it for a long time, refrigerate.   

Monday, October 14, 2013

Perfect Fall Day

It has been rainy, rainy, rainy and we have been cooped up inside for several days. But yesterday we had pumpkins to carve and the ingredients for chili, plus my husband had some pumpkin ale in the fridge and there was football on TV so he was pretty happy. Pretty much the makings for a perfect fall day. By noon we had put the chili in the slow cooker and made these:  


And by we, I mean that I helped with the chili but was not at all involved in making the pumpkin masterpieces. That was all my husband and his brother - they are so creative!  Did you know that gourds are not at all easy to carve like pumpkins? Yeah, neither did we. That green Frankenstein one was impossible to cut open. Good thing we had a saw.  


So now to the recipe.  This award winning chili recipe was created by my brother and sister-in-law and it is amazing. They are very kind to allow me to share it with you.  I think it strikes the perfect balance between being nice and meaty, while still containing beans.  When we serve it to people who don't normally like beans in chili, they are always impressed by how good it is! 

Walt & April's Springtown Chili
This yields roughly 6 dinner-size servings of mild to medium chili.  We have often found that this chili is better the day after cooking.  

1 lb. ground beef
1 lb. pork sausage 
1 large onion, medium chop
1 large green pepper, membrane and seeds removed, chopped
1 teaspoon oil
5 cloves garlic, minced 
1 16 oz. can black beans, mostly drained 
1 15 oz. can pinto beans, mostly drained
1 14.5 oz can diced tomatoes
1 8 oz. can tomato sauce 
3 tablespoons chili powder 
1 ancho (dried poblano) chili, de-seeded and chopped
2 teaspoons salt 
1 tablespoon freshly ground black pepper
1 teaspoon ground cumin
1 teaspoon dried basil
1 dash Worcestershire sauce
1 dash habanero hot sauce 

Brown ground beef over medium-high heat, waiting to break up the meat so that most pieces sear on the outside. Drain, then repeat with sausage.  Saute onion and green pepper over high heat in 1 teaspoon oil (if needed), until slightly brown.  

Combine all ingredients except the beans in the slow cooker and stir to combine.  Then add the beans and gently stir until they are roughly mixed in.  Cover and turn heat to high for 1 hour. Reduce heat to low and cook for 9 or so hours. If your slow cooker runs hot like mine, you can get away with cooking it for 8 hours on low the entire time.  For a spicier chili, double the chili powder or add a couple tablespoons of your favorite hot sauce.  

We like to top it with chopped avocado, raw diced onion, and maybe some tortilla chips.  

My son likes it with daiya shredded "cheese":  


A note about ingredients: 
When this recipe was originally developed, it called for a tube of Jimmy Dean pork sausage.  It probably tastes the best if you use that but I don't cook with conventionally raised meat anymore. So I've been using Italian pork sausage from Whole Foods and I think it still turns out pretty great.

I also try whenever possible to avoid using canned goods so I often substitute 4 cups of homecooked beans for the two cans of beans. The tomatoes are tougher to substitute but I recently found some in glass jars that are not diced but seem to work ok with this recipe.  

Wednesday, August 28, 2013

Slow Cooker Chicken with Honey Garlic Sauce

Lately, dinner planning has consisted of asking myself one of these two questions:  What already made food do we have in the freezer? -OR- What can I throw into the slow cooker? In this case, the answer is chicken and some stuff I always keep in the fridge. This is an amalgamation of a couple of different recipes that I'm pretty sure were probably all stolen from the same person.  It is really easy and super delicious.  I usually serve it with rice.  

Slow Cooker Chicken with Honey Garlic Sauce
1.5 lbs chicken thighs (or whatever cut you want really) 
1 cup honey
1/2 cup low-sodium soy sauce 
1/4 cup ketchup  
1 1/2 Tbs. neutral tasting oil (such as peanut or canola)
1/4 cup chopped onion
2 cloves garlic, finely chopped or minced
1/2 tsp salt (or to taste) 
1/2 tsp black pepper
1/4 tsp red pepper flakes (or to taste)  

Combine ingredients in slow cooker.  Cook on low for 4-6 hours, depending on your slow cooker. A 4-quart one is probably the best size.  If you have larger one or one that runs hot like mine, you might even want to check after about 3 hours to avoid drying the meat out.

Monday, August 5, 2013

Avocado Fudgesicles

My 3-year-old had never had ice cream until a month ago on the 4th of July.  Part of the reason is that most ice cream has dairy in it, but the main reason is that we eat pretty healthy and I just saw no point in introducing him to something like that before it was necessary.  Before you think I live on Mars or know some magical secret, I never said he hasn't had any junk food before.  In fact, when we took him to the dentist last time they gave him one of those blue Fla-Vor Ice things.  I could have said no but I try to have a general policy that if we are out of the house and my son is offered a food, he can eat it as long as he is not allergic to it.   I was really mad about it though because it is the dentist!  If they can't even back me up on the whole "sugar is bad for your teeth" thing, well then my kids are never gonna believe anything I say!  

Anyway, depending on your definition of ice cream, my son still hasn't had it since the recipe I used was mostly avocado, dates, cocoa powder, and canned coconutmilk.  But to his inexperienced palate, the frozen treat I made was AMAZING.  Actually, my husband and I thought it was pretty great too!  I can't wait to make it again, it was that good.  

Here is the link to the recipe I made at  The Whole Life Nutrition Kitchen.  I followed her instructions and ingredients exactly and was quite pleased with the result. The only point I disagree with the blogger on is that she says you can eat it as a pudding.  I personally could taste a mild avocado flavor before it was frozen so I definitely recommend putting it in the popsicle molds and freezing it before serving. 

Sorry I don't have any pictures to post.  We gobbled them up too quickly!  

Monday, July 15, 2013

Peanut Butter Bars


This is my step-sister Julie's recipe and she is famous among friends and family for making the best peanut butter bars ever. I was incredibly honored when she shared it with me at my bridal shower and I used to guard the recipe as a closely held family secret. But now with the advent of pinterest, there are lots of similar peanut butter bar recipes all over the place. Don't get me wrong, these are still the best! I didn't make any ingredient changes to her original recipe, other than use Earth Balance instead of butter.  It is ahhh-mazing, made either way.   

If you don't care too much what the bars look like, this is one of the easiest desserts ever. If you want them to be picture perfect to give away to friends, like Julie does, they take a tiny bit more work.  

Peanut Butter Bottom Layer
2 cups peanut butter*
2 1/2 cups powdered sugar
1/2 cup brown sugar
1/2 teaspoon vanilla 
1/2 cup non-hydrogenated margarine, melted

Add the peanut butter, powdered sugar, and brown sugar to a mixing bowl.  Stir the vanilla into the melted margarine and then add both to the bowl.  Stir everything together (the mixture will be stiff). Press into an ungreased 9x11 pan. If you want them to look pretty, make sure to use a spatula to level the peanut butter mixture out so that it is even thickness all the way around (I never do this. Or I have once but it was so long ago I might have imagined it). Also, I do not have a 9x11 pan and so mine never come out looking quite as good as when Julie makes them in the 9x11 pan.  But they still taste great!  

Chocolate Topping
1 pkg semi-sweet chocolate chips (make sure they are dairy free!)  
1/2 cup non-hydrogenated margarine

Melt the chocolate chips and butter in a saucepan over low heat.  Stir until completely smooth and pour over peanut butter layer, spreading with a spatula to make it as smooth and even as you can. Chill in the refrigerator for 3 hours and then cut into bars.  You can really chill them as long as you want, but pull them out of the fridge about 10 minutes before you cut them to make the cutting go a little more smoothly.  


*You must buy regular old peanut butter for this recipe.  No healthy peanut butters that lack added oils or must be stirred.  Think Jiff, Skippy, or Peter Pan...  


Tuesday, June 4, 2013

Perfect for Summer Potlucks


Oh man, I love this dip because I invented it to take to a vegan potluck with friends last summer. It just tastes like warm weather, kids running around in the sprinkler, and pure summer bliss. My husband thinks I am weird for saying that but this is one of those foods that really brings back the memories for me...


Vegan 7-layer Dip*


1 can refried beans
8 oz tofutti “Better than Sour Cream” (about ⅔ of the container; or you could use fake cream cheese in a pinch)  
3/4 tsp taco seasoning mix (or to taste)
guacamole (about 3 or 4 avocado’s worth)
prepared salsa
⅓ cup chopped green onion
½ cup chopped tomato
very thinly sliced lettuce, enough to sprinkle on top
2 ¼ oz can sliced black olives   


1. Spread one can of refried beans in the bottom of an 8x8 baking pan.
2: In a bowl, combine  8 oz of Tofutti “Better than Sour Cream” with the taco seasoning. The more you add, the less you can tell that it's dairy-free sour cream so start with 3/4 teaspoon and if it's not too spicy, keep adding more! Spread on top of the beans.
3.  Next spread on a thin layer of salsa and then the guacamole.
4.  Sprinkle with lettuce, green onion, tomato and black olives. 

If you want to make this ahead, wait to add the guacamole and the veggies until just before serving.  

Variations: Add some ground meat (cooked in taco seasoning) or sprinkle some shredded fake cheese on top.


*Ok, not actually 7 layers... but you get the idea.

Sunday, April 28, 2013

Chocolate Frosting


Frosting that's delicious and easy to make? Yes, please.


Basic Chocolate Frosting

2 1/2 cups powdered sugar
1/2 cup cocoa powder (plain, unsweetened)
1/2 cup Earth Balance Buttery Spread (no need to soften but make sure you use the kind in the tub)
3 Tbsp soy or almondmilk
2 1/2 tsp vanilla extract

Using a handmixer, blend together the Earth Balance, powdered sugar, and cocoa powder.  When it's roughly mixed together, add the milk and vanilla.  Blend until smooth.


Note:  Putting this frosting into the fridge changes the texture a bit so I recommend making it the same day you plan to frost your cake.


P.S. When my mixer broke during the last test batch, I found out that you can mix this frosting in a pinch using a handblender.  It took a long time to get smooth though... 


Tuesday, April 23, 2013

Asparagus Two Ways

Asparagus with Walnut Oil Vinaigrette

So every year I wait very patiently for asparagus to come into season and then we cook it all the time.   Asparagus soup, fried asparagus, roasted asparagus, asparagus with eggs, steamed asparagus with vinaigrette...  My husband and I usually eat a full pound each when we make it for dinner. By the end of the season, I feel like I never want to see a spear of asparagus ever again.  But then inevitably, when February comes around again, I am dying to see the fresh stuff come into the grocery stores.

This year has been an epic failure.  I waited and waited but kept seeing the regular old low quality stuff from Mexico coming in week after week.  I kept thinking, "Wow, the season must be very late this year!"  Until a couple of weeks ago I finally e mailed my brother in California to find out if they were having asparagus season out there.  It turns out, it was already OVER.  But I will not let a spring go by without asparagus so I bought a whole bunch and got cooking.  I'm probably not going to get sick of it this year but, oh well, there is always next year!   

Here are two ways I like to dress 2 pounds of steamed asparagus. Both serve 4 regular people or 2 asparagus crazy adults.  

Walnut Oil Vinaigrette
adapted from Emeril

6 Tbsp walnut oil*
1/4 cup neutral tasting oil (such as canola, grapeseed, or light olive oil)
1/4 cup white wine vinegar
2 teaspoons dijon mustard
1 Tbsp finely chopped shallot
1/2 teaspoon salt
1/2 teaspoon freshly ground pepper
Optional garnishes: toasted walnuts, chopped fresh parsley.

Dump all the vinaigrette ingredients into a tupperware or glass jar with a tight fitting lid and shake.  Pour over asparagus and sprinkle with some more salt. That's pretty much it.

*Walnut oil is available at better grocery stores and at health food stores.  Refrigerate after opening.  


Mustard Mayo Sauce

1/4 cup Tbsp light or regular mayonnaise 
2 Tbsp olive oil
2 Tbsp white wine vinegar
2 tsp dijon mustard
salt and pepper to taste

Stir together all the ingredients.  Add salt and pepper to taste.  Pour over the asparagus.  

This sauce tastes too strong on its own but is perfect on asparagus.  


Wednesday, March 27, 2013

Italian food without cheese?

Yes!!  Italian food can still be delicious without cheese!  I think making dairy free Italian-inspired dishes really boils down to these three factors:  
  • Good ingredients: Food that tastes good on its own doesn't really need cheese to make it better.  I think restaurants and home cooks often use cheese to cover up something that wasn't really that great in the first place (like a boring jar of spaghetti sauce).  So using fresh ingredients (or at least better canned tomatoes) can go a long way.  If you are new to dairy free cooking and have the cash to spare, I'd recommend going to one of those specialty stores where you can taste different olive oils and pick one you really like.  
  • Salt and fat:  Especially when we're talking about parmiggiano regiano and pecorino romano cheeses, a lot of the flavor profile can be explained by the salt and fat content.  So if your dairy free dish tastes a little bit lacking, it could benefit from a little more olive oil and a sprinkling of salt.  
  • Getting used to it:  It took me a couple of months to get used to having pasta dishes without dairy products but for the most part I don't really notice anymore and I know it is so much healthier to leave the canned parm off of my dish.  But let's face it, there is no really good substitute for fettuccine alfredo. (There are some things I make when I'm craving that type of food.  But that's another blog post).  Most of the time I just focus on other types of Italian dishes, which can be delicious without dairy. Like this one:  

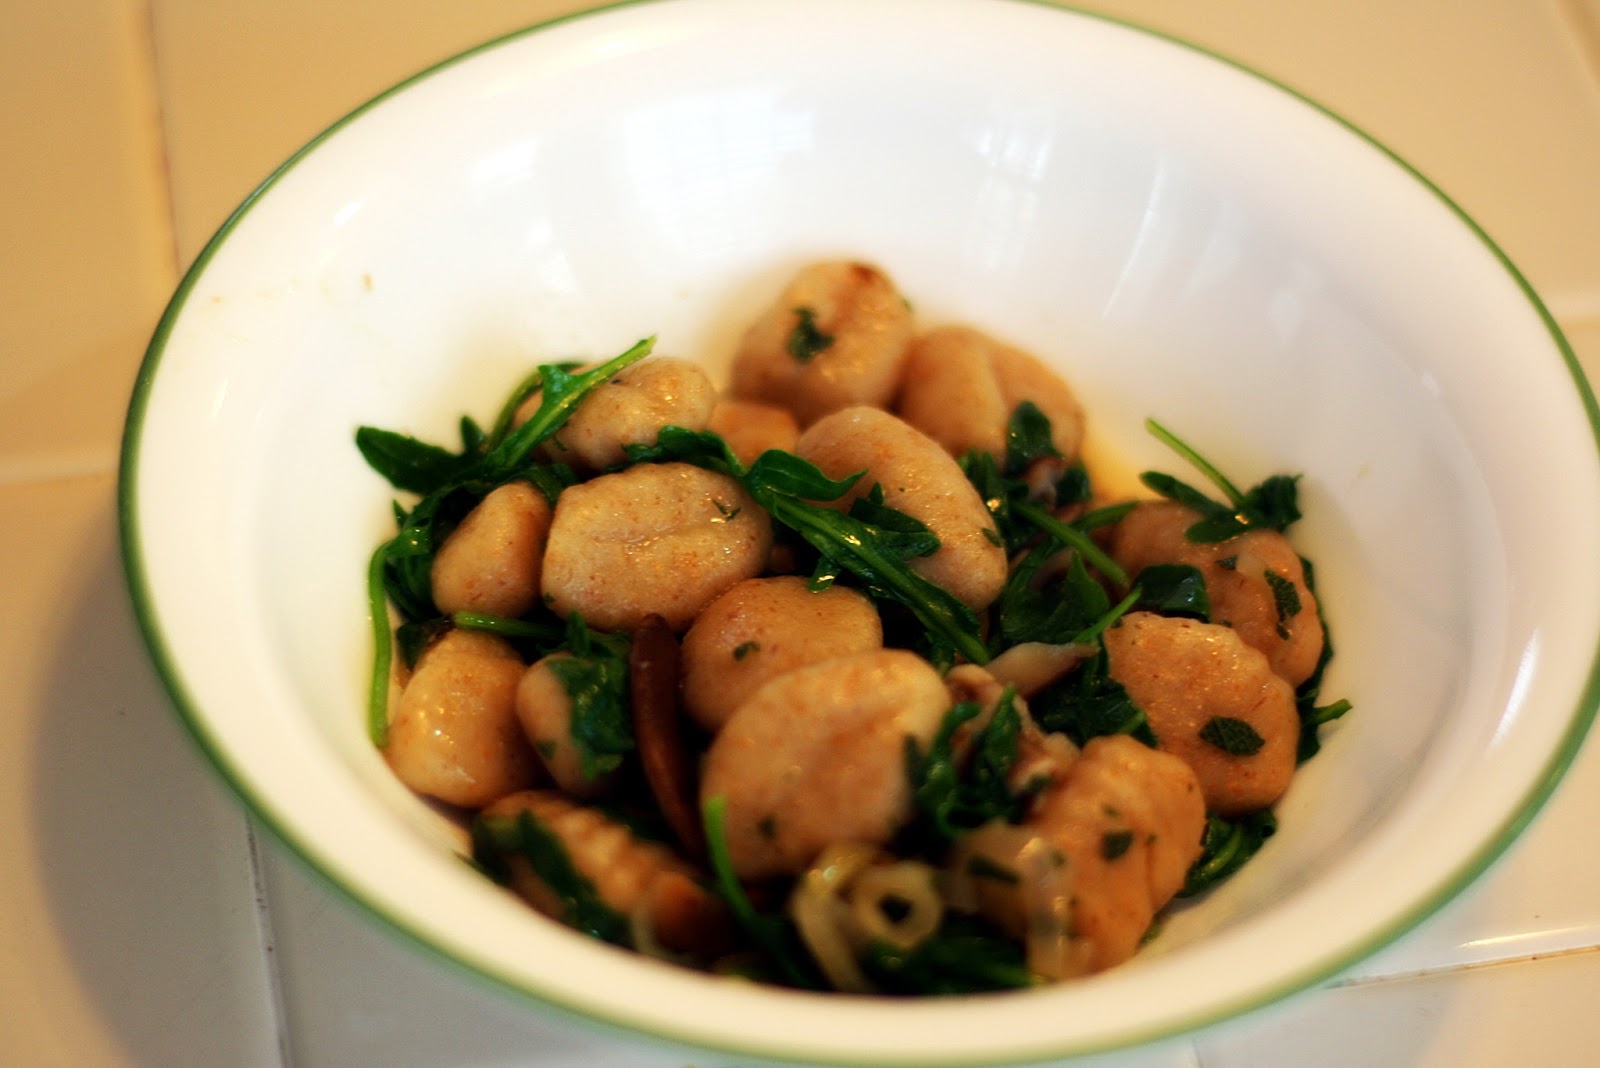
Gnocchi with Mushroom Sauce 
adapated from this website: danatreat.com
2 Tbsp non-hydrogenated margerine 
2 Tbsp extra virgin olive oil
12-18 oz  fresh shiitake mushrooms, stems removed and sliced  
1/2 cup thinly sliced shallots
1 1/2 cup chicken stock or broth 
2 Tbsp chopped fresh sage   
3 cups baby arugula (or chopped up regular arugula)  
1 lb potato gnocchi  (find it in the pasta aisle or in the frozen section)  


1. Start boiling a pot of water for the gnocchi.  

2. Heat a skillet over medium heat and melt the margarine and oil together.  Add the mushrooms and shallots.  Cook for about 10 minutes, stirring once in awhile until they are lightly browned.  (It's ok if you don't get yours browned, if they have softened up you can just go on to the next step).  


3. Add the stock and the sage and simmer 6-8 more minutes, until the liquid has reduced slightly.  You will want to make sure it is really bubbling in order for it to reduce properly.  

4. Meanwhile, add the gnocchi to the boiling water and prepare according to the package directions.  Normally, it will be done when most of the pieces float to the top.  

5. Add the arugula to the skillet with the mushroom mixture and cook for about 2 minutes until wilted.  Then use a slotted spoon to move the cooked gnocchi into the skillet and mix everything together.  Add salt and pepper to taste.  

Serves 3-4 (but make sure you serve it with a salad or something else.  I don't t hink it would be enough food for dinner without having a side dish.)   

A note about substitutions:  If you wanted to make this a bit healthier, you could omit the margarine and use vegetable stock.  You could also use whole wheat potato gnocchi (which I did the last time we made this, maybe you can tell in the pictures).  But here's the thing, I don't think will be quite as good.  This dish is pretty simple and it's really delicious made with the exact ingredients listed above.  So maybe make it the first time as it is, then you can tweak it a bit if you want later.  


Tuesday, March 19, 2013

The Easiest Guacamole Ever


I know most people think of guacamole as a summer appetizer but I just heard on a podcast the other day that California avocados are in season and taste the best in the winter.  This is great news for me because I eat it year round and on just about everything.  When I first gave up dairy, I became an avocado addict.  I have one word for you:  Creaminess.  Which is, admittedly, something that can be lacking from some dairy free foods.  So I started putting diced avocado on top of my chili, instead of cheese and sour cream.  And I started putting guacamole on hamburgers, sandwiches, and on top of tacos.  Sometimes, avocados can really satisfy that need for something creamy and I barely even notice that the cheese is gone.  

I must confess, this isn't exactly a recipe. It's just a much simpler way to put guacamole on your table than having to chop up onion, tomato and garlic.  

What you'll need: 

avocados (You will probably want at least 3 or 4 if you're serving more than 2 people)
a lime or lemon
that leftover jar of prepared salsa in your fridge
salt 


First, cut open and mash up the avocados (little brown spots are ok but make sure you get any stringy parts out).  Add a small spoonful of the salsa and a generous squeeze of lime/lemon juice.  After you mix it up, add salt to taste.  


This isn't the prettiest guac in the world so I wouldn't recommend serving it to company you are trying to impress but it's great on a weeknight.  We had ours on homemade black bean burgers this week.  

Saturday, March 9, 2013

Butternut Squash Pear Soup

My friend Tracy introduced me to this recipe (thank you Tracy!).  The pears make this soup sweet, so my toddler gobbles it up!  If you prefer your soups a little less sweet, make sure to add the chopped cilantro to your bowl; it adds a savory flavor.  

To save time, you could use frozen diced butternut squash instead of fresh (just don't cook it for as long).  

P.S. You can't taste the wine once it cooks so don't worry if you have picky eaters.  They won't notice it.    

Butternut Squash Pear Soup
Adapted from The Vegetarian Epicure, by Anna Thomas 

1 lb butternut squash (peeled, seeded and diced; you'll have about 10 oz of squash when you're done) 
1 large yam or sweet potato, peeled and diced
2 cups vegetable broth
1 1/2 cups water
1 cinnamon stick
3/4 tsp salt
2 Tbs non-hydrogenated margarine  
2 medium onions. sliced
3 large, ripe pears
1/3 cup dry white wine
1/4 cup canned coconutmilk
chopped cilantro (optional; as a garnish)  

1.  Put the butternut squash and yam cubes in a pot with the vegetable broth, water, cinnamon stick and salt.   Simmer until tender, about 40 minutes. (If you are using frozen squash,  add it about halfway through cooking the yam).  Remove the cinnamon stick.

2.  Meanwhile, melt the margarine in a skillet over medium-high heat. Saute the onions, stirring occasionally, until they start to caramelize.  Peel, core and thinly slice the pears and add them to the onions. Continue cooking for about 5 minutes, stirring often.  Add the wine, cover and simmer for 20 minutes.

3.  Add the pear mixture to the soup and puree with an immersion blender (you could also use a regular blender or a food processor).  Then, add the coconutmilk, and season to taste with salt and pepper.   Heat the soup again just to a simmer, but do not boil.  If you want, you can add a drizzle of leftover coconutmilk and a sprinkle of the chopped cilantro.  

Serves 4 for dinner, or 6 as an appetizer 


Sunday, February 3, 2013

My Favorite Mashed Potatoes

You can always make your favorite mashed potato recipe substituting dairy free margarine and a neutral-flavored alternative milk.  The potatoes will be good but they will not be as good as these ones.  This recipe for mashed potatoes is so good you can serve it to your dairy-loving friends and no one will notice there is no cream or real butter. Thanks to my mother-in-law for letting me in on the secret of cooking the potatoes in chicken stock.


My Favorite Mashed Potatoes


  • 5 large potoates
  • Chicken stock or broth to cover (about 4 cups)
  • 1/2 cup unsweetened alternative milk (I like SO Delicious brand coconutmilk but soy or almondmilk would work too)
  • 3 Tbs non-hydrogenated margarine*
  • salt and pepper to taste


1. Chop the potatoes into uniform pieces (about 1 inch).  Add enough chicken broth to cover the potatoes completely (you can also add some water if the broth doesn't completely cover your potatoes). Bring potatoes and broth to a boil.

2. Cover, reduce the heat to medium and simmer until tender, about 12 minutes. You will want them to be tender enough to mash easily, but don't overcook or they may absorb too much stock and be thinner than you would like.

3. Drain the potatoes, reserving some of the broth.

4.  Put the potatoes through a potato ricer.  If you don't have a ricer, you can just use a regular potato masher but they will not be as luscious as if you use a ricer.  Mix in the milk and margarine.  Add extra stock if you want more liquid.  Season with salt and pepper.  If you've used canned chicken broth you probably will not need to add salt but homemade stock will probably need some.


*To make this recipe soy-free, make sure your margarine does not contain soy, or use olive oil.